How To
How To Make Your Battery Last Longer On Your Gadget
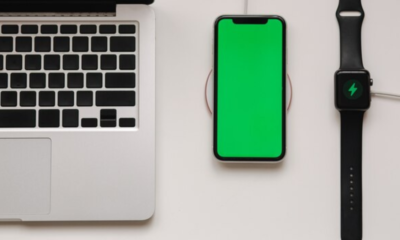
Everyday we rely heavily on our gadgets, from smartphones and tablets to laptops and smartwatches. Fortunately, there are several strategies and tips you can implement to make your battery last longer on your gadgets.
Everyday we rely heavily on our gadgets, from smartphones and tablets to laptops and smartwatches. However, one common issue we all face is the limited battery life of these devices. It can be frustrating when your gadget runs out of juice at a crucial moment. Fortunately, there are several strategies and tips you can implement to make your battery last longer on your gadgets and ensure they serve you well throughout the day.
Adjust Screen Setting To Make Your Battery Last Longer:
One of the most significant drains on your gadget’s battery is the screen. By adjusting the screen brightness to a lower level, you can conserve battery life without sacrificing usability. Many devices also offer adaptive brightness settings that adjust based on your surroundings, further optimizing battery usage.
In addition to adjusting screen Brightness, consider reducing the screen timeout and enable the lock screen when your gadget is not in use. Shorten the time it takes for your gadget’s screen to turn off automatically when not in use. Locking your device prevents accidental taps and keeps the screen off when it’s in your pocket or bag, conserving battery power. This simple adjustment can save a surprising amount of battery over time.
Several gadgets and apps now offer a dark mode or night mode option. Dark mode uses less power on devices with OLED or AMOLED screens, as it doesn’t require as much energy to display black pixels. Switching to dark mode can extend your battery life, especially on devices with OLED screens.
Manage Apps To Make Your Battery Last Longer:
Background apps and processes can silently consume power even when you’re not actively using them. Review your device’s settings to see which apps are running in the background and close those that are unnecessary. Some gadgets also have battery optimization features that can help manage background processes more efficiently.
Location services, used by apps to determine your device’s location, can be a significant battery drain. Review the apps that have access to your location and consider limiting it to only when the app is in use or necessary.
Many apps allow you to customize their settings for power consumption. For example, social media apps often have an option to reduce the frequency of updates or disable auto-play for videos. Explore the settings of your most-used apps to find ways to minimize their battery impact.
Regularly updating your apps not only provides bug fixes and new features but also helps improve battery efficiency. Developers often optimize their apps for better performance, including reduced battery consumption, in newer versions.
Basic Device Settings To Make Your Battery Last Longer:
Connection settings, Modern gadgets come with a multitude of features and connectivity options like Wi-Fi, Bluetooth, GPS, and NFC. While these features are undoubtedly handy, they can also be significant battery hogs. Disable them when you’re not using them to make your battery last longer.
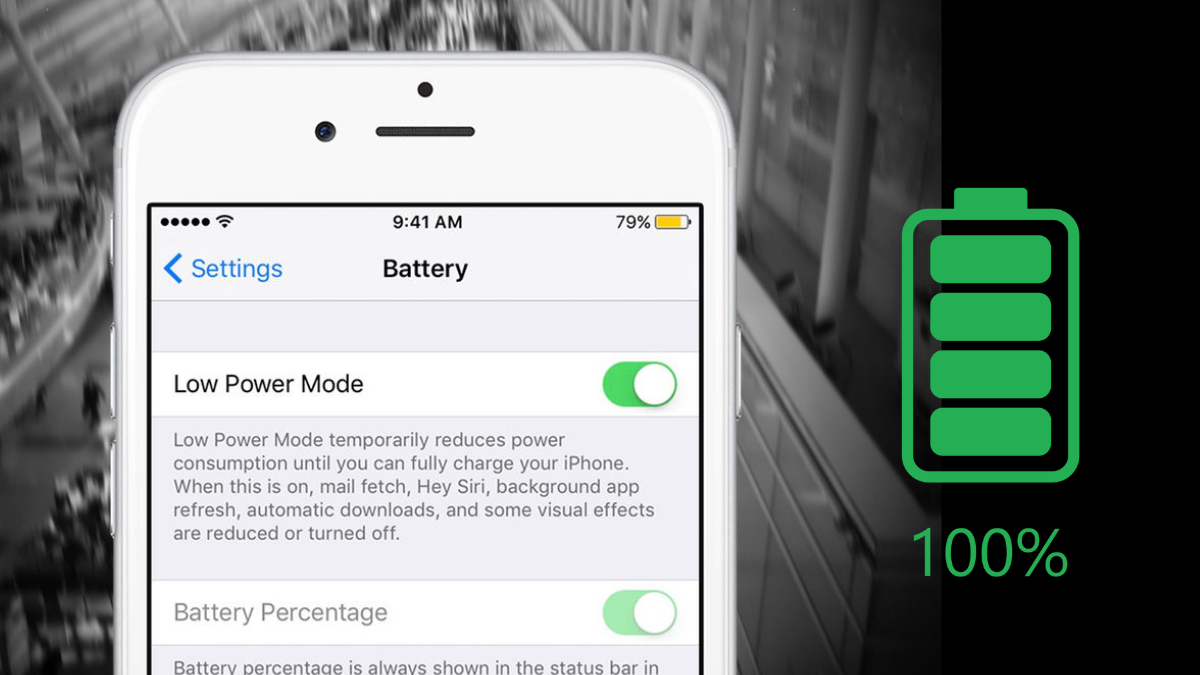
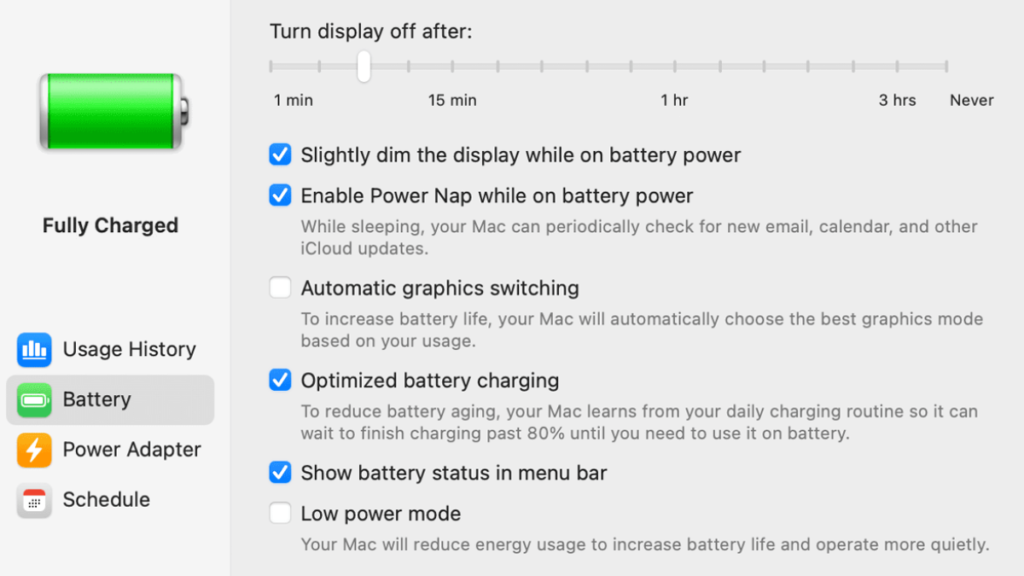
Use battery saver mode, Most gadgets offer a battery saver or low-power mode that reduces performance and background activity to save power. Enable this mode when your battery is running low to squeeze out extra usage time.
Notifications, Customize your notification settings to receive alerts only for important messages and apps. Reducing the number of notifications you receive can prevent your screen from turning on and reduce battery usage.
Disable vibrations and haptic feedback, vibrations and haptic feedback use a surprising amount of power. Consider disabling these features for notifications and keyboard presses if you’re looking to make you your battery last longer.
Utilize Airplane Mode, when you are in an area with weak or no cellular signal, your device works harder to establish and maintain a connection. If you are not actively using your gadget for calls or data, switch it to airplane mode to save significant battery power.
Power-Hungry Widgets, Widgets on your device’s home screen can provide quick access to information but can also consume battery life if they frequently update. Evaluate which widgets are essential and remove unnecessary ones to save power.
Common Practice To Make Your Battery Last Longer:
Monitor Battery Usage, Most gadgets offer battery usage statistics that can help you identify which apps and processes are consuming the most power. Use this information to make informed decisions about what to close or modify.
Battery Health Monitoring, Some gadgets offer built-in tools to monitor and manage battery health. Check if your device provides information on the battery’s maximum capacity and consider replacing it if it falls below a certain threshold.
Proper Storage and Temperature, Extreme temperatures, both hot and cold, can negatively impact your gadget’s battery life. Avoid exposing your device to temperature extremes whenever possible, as they can cause irreversible damage to the battery. storing your gadgets in extreme temperatures, such as a hot car in the summer, can damage the battery and decrease its overall lifespan. Whenever possible, keep your devices in a cool, dry place to maintain battery health.
Invest in Quality Accessories To Make Your Battery Last Longer:
Using official chargers and high-quality cables can make a difference in how efficiently your gadget charges. Avoid using third-party accessories that may not be optimized for your device.
Carry a Portable Charger, for those times when you can’t access a power outlet, a portable charger or power bank can be a lifesaver. They come in various sizes and capacities to suit your needs.
Keep Software Up to Date To Make Your Battery Last Longer:
Software updates often include performance enhancements and bug fixes that can improve battery efficiency. Make sure your gadget’s operating system and apps are up to date to benefit from these improvements.
Optimize Push Notifications, Push notifications for emails, social media, and other apps can be demanding on your battery, especially if you receive them frequently. Consider adjusting notification settings to receive updates at less frequent intervals or selectively for essential apps.
Generally, making your battery last longer on your gadgets requires a combination of smart practices, settings adjustments, and regular maintenance. By implementing these additional strategies, you can further optimize your device’s battery performance.
Remember that the specific tips and options available may vary depending on the type and brand of your gadget, so be sure to explore your device’s settings thoroughly.
Not only will you reduce the inconvenience of frequent charging, but you will also contribute to a more sustainable and eco-friendly use of technology, as longer-lasting batteries mean fewer replacements and less electronic waste.
So, take the time to fine-tune your device settings, and make conscious choices about which features and apps truly require constant access. With these strategies in mind, you can enjoy longer-lasting gadget performance and get the most out of your cherished devices.
So, take these steps today, and you will find yourself with more power at your fingertips when you need it most.


Google Maps offers a plethora of features to enhance your navigation experience, and one such feature is the ability to explore locations in 3D. By activating the 3D view, users can immerse themselves in a more lifelike representation of cities, landscapes, and landmarks. In this comprehensive guide, we’ll walk you through the step-by-step process of turning on 3D view on Google Maps across different platforms.
For Desktop Users
1. Open Google Maps: Launch your preferred web browser and navigate to the Google Maps website.
2. Switch to Satellite View: On the bottom-left corner of the screen, locate the square box labeled “Satellite” and click on it. This will switch the map view to satellite imagery.
3. Activate 3D View: While in satellite view mode, you’ll notice a “3D” button on the right-hand side of the screen, typically next to the compass icon. Click on this button to activate the 3D view. The map will tilt, providing a three-dimensional perspective.
4. Navigation and Exploration: Use your mouse to navigate in 3D. Click and drag to pan around the map. Hold down the Ctrl key (Cmd on Mac) and drag your mouse to adjust the angle or rotate the view. Scroll up and down to zoom in and out.
For Mobile Users (Android and iOS):
1. Open the Google Maps App: Launch the Google Maps app on your smartphone. If you don’t have the app installed, you can download it from the Google Play Store (for Android) or the Apple App Store (for iOS).
2. Select Satellite View: Once the app is open, tap on the layer icon, typically located in the upper-right corner of the screen. This will open the map type selection menu. Choose “Satellite” from the list of options.
3. Enable 3D View: Unlike the desktop version, activating the 3D view on mobile devices requires a different gesture. Use two fingers to swipe up on the screen. This action will tilt the view, transitioning it into 3D mode.
4. Explore in 3D: Navigate around the map by dragging with one finger. Pinch your fingers together or spread them apart to zoom in and out. To rotate the view, twist two fingers on the screen.
The 3D feature on Google Maps is a valuable tool for exploring and understanding geographical locations in a more immersive way. Whether you’re planning a trip, studying urban landscapes, or simply satisfying your curiosity, activating the 3D view can enhance your mapping experience significantly. By following the step-by-step instructions provided in this guide, you can easily unlock the full potential of Google Maps’ 3D capabilities across desktop and mobile devices. Happy exploring!
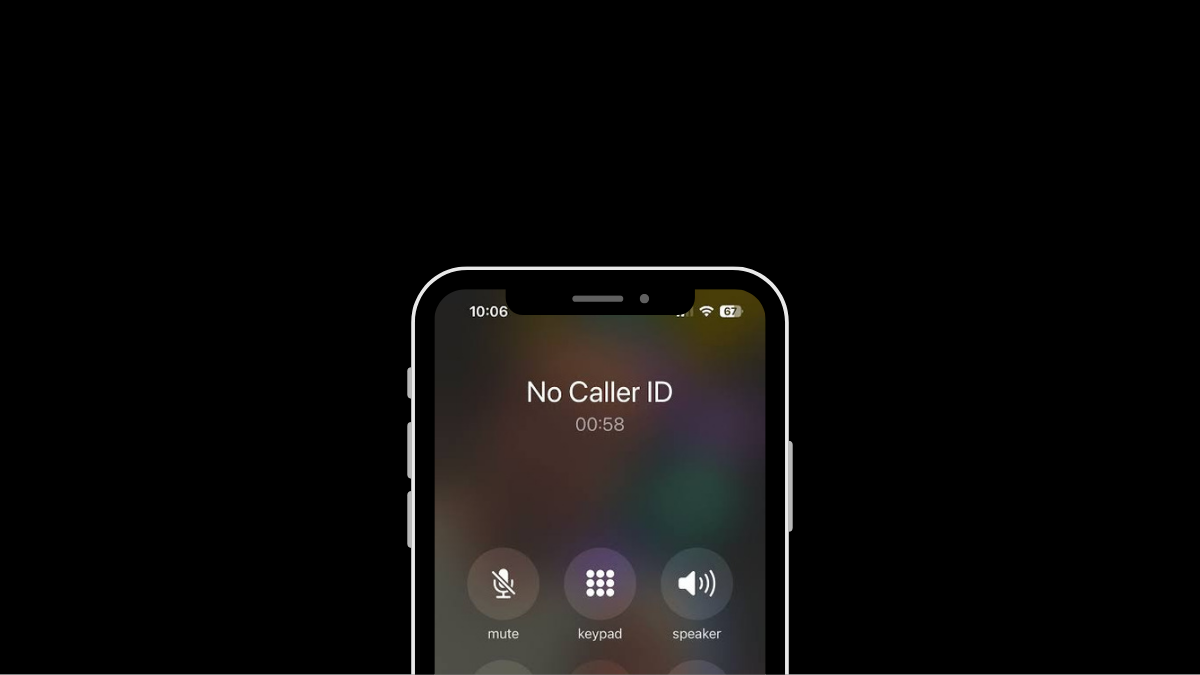
Having your phone number appear as “Private” or “Unknown” can be useful for maintaining privacy, but there are times when you might want to deactivate this feature. Whether you’re making important calls to friends, family, or businesses, having your number visible can enhance communication and ensure your calls are recognized and answered promptly. This guide provides step-by-step instructions for deactivating the private number feature on both iPhone and Android devices, empowering you to take control of your caller ID settings.
Deactivating Private Number on iPhone:
1. Open Settings: Locate and tap the Settings app on your iPhone’s home screen.
2. Access Phone Settings: Scroll down and tap on the “Phone” option in the Settings menu.
3. Caller ID Settings: Within the Phone settings, find and tap on the “Show My Caller ID” option.
4. Toggle Caller ID: Tap the toggle switch next to “Show My Caller ID” to turn it on (ensure it’s green). This action will make your phone number visible to recipients of your calls.
5. Verification: After enabling the setting, make a test call to confirm that your number now appears on the recipient’s caller ID.
6. Completion: Once your caller ID is successfully displayed, the private number feature is deactivated on your iPhone.
Deactivating Private Number on Android:
1. Open Phone App: Launch the Phone app on your Android device as if you were going to make a call.
2. Access Menu: Look for the three dots (menu) or additional options usually located at the top right corner of the screen. Tap on it.
3. Navigate to Settings: From the menu, select “Settings” or a similar option.
4. Find Caller ID Settings: Scroll through the settings options until you find “Supplementary Services,” “More settings,” or “Call settings.” Tap on it.
5. Caller ID Setting: Tap on “Show my caller ID,” “Caller ID,” or a similar option listed in the settings.
6. Select Display Option: Depending on your device, choose “Show number” or the equivalent to ensure your phone number is displayed to recipients of your calls.
7. Verification: Make a test call after adjusting the settings to confirm that your number now appears on the recipient’s caller ID.
8. Completion: Once your number is successfully displayed, the private number feature is deactivated on your Android device.
Additional Tips:
Patience: Changes to caller ID settings may take a few minutes to take effect. If your number still appears private immediately after making changes, wait a bit and try again.
Restart Device: If the settings don’t seem to apply, restarting your device can help refresh the settings.
Carrier Settings: If the issue persists, contact your phone carrier directly. They may have set your number to appear as private, and they can assist you in changing this setting.
By following these steps, you can easily deactivate the private number feature on both iPhone and Android devices, ensuring your calls are recognized and answered promptly.

The iPhone contacts feature is incredibly useful, but it can sometimes become a dependency. Have you ever realized you can’t recall your closest family member’s phone number anymore? If your contacts disappear or get deleted, it could pose significant problems.
Restoring deleted or missing contacts on your iPhone can be done through various methods, depending on your backup preferences and the availability of your data. Here’s a comprehensive guide:
Method 1: Restore from iCloud Backup
1. Check iCloud Settings: Ensure that iCloud Contacts is enabled on your iPhone. Go to Settings > [Your Name] > iCloud, and toggle the Contacts switch to the on position.
2. Restore from iCloud Backup: If you have an iCloud backup that contains your contacts, you can restore them easily.
– Go to Settings > [Your Name] > iCloud > iCloud Backup.
– Make sure your device has been backed up recently.
– Go to Settings > General > Reset > Erase All Content and Settings.
– Follow the setup prompts until you reach the Apps & Data screen.
– Choose “Restore from iCloud Backup” and select the relevant backup containing your contacts.
Method 2: Restore from iTunes Backup
1. Connect to Computer: Use a USB cable to connect your iPhone to your computer.
2. Open iTunes: Launch iTunes on your computer. If you’re using macOS Catalina or later, open Finder instead.
3. Select Device: Select your iPhone when it appears in iTunes or Finder.
4. Restore Backup: Click on “Restore Backup” and choose the most relevant backup file that contains your contacts.
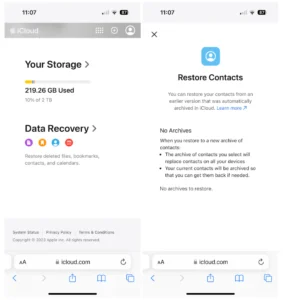
Method 3: Use iCloud.com
1. Access iCloud.com: Open a web browser on your computer and visit iCloud.com.
2. Sign In: Sign in with your Apple ID and password.
3. Open Contacts: Click on the Contacts icon to view your contacts.
4. Restore Contacts: In the bottom left corner, click on “Settings” (gear icon), and choose “Restore Contacts.” You can then select a previous archive to restore your contacts from.
Method 4: Check Other Accounts
1. Check Account Settings: Go to Settings > Passwords & Accounts on your iPhone.
2. Verify Accounts: Make sure accounts such as Google, Outlook, or any other accounts where you may have synced contacts are enabled.
3. Sync Contacts: Ensure that the contacts sync option is turned on for each account.
By following these steps, you can restore deleted or missing contacts on your iPhone and minimize the risk of data loss in the future.

itel RS4 Review

Armor 26 Ultra Unveiled with 15,600mAh battery

Apple Pencil Pro Unveiled with Standout Features

-

 How To6 months ago
How To Use Voice Commands for Hands-Free Control.
-
 How To6 months ago
How To Unlock Your Smartphone If You Forget the PIN
-

 Reviews9 months ago
Samsung Galaxy Watch 6 vs. Galaxy Watch 6 Classic: A Timeless Face-off!
-
 Best Smart Home Gadgets7 months ago
How To Set Up a Smart Home: A Comprehensive Guide
-

 Tech News9 months ago
Gurman: Apple Watch Redesigned ‘Apple Watch X’
-
 How To6 months ago
How to Troubleshoot Common Gadget Problems
-
 Apps9 months ago
Photo Magic: How To Use Quick Crop on iPhone Photos App iOS 17
-

 Tech News6 months ago
ChatGPT Adds Voice Chats for Free Subscribers on iOS and Android Platforms.
Pingback: How To Maintain Electronic Gadgets