How To
How to Troubleshoot Common Gadget Problems
By following these steps, you can often resolve issues on your own, saving time and money on professional repairs

In our increasingly digital world, gadgets have become an integral part of our daily lives. Whether it’s a smartphone, laptop, tablet, or any other electronic device, we rely on these gadgets for communication, entertainment, work, and more.
However, like all things, gadgets are not immune to problems. Technical glitches and issues can arise, causing frustration and disruption to our routines.
Fear not! This guide aims to empower you with the knowledge and techniques to troubleshoot common gadget problems. By following these steps, you can often resolve issues on your own, saving time and money on professional repairs.
1. Slow Performance
Problem: Your gadget is running slower than usual, taking longer to open apps or complete tasks.
Solution:
- Clear Cached Data: Over time, apps accumulate cached data, which can slow down your device. Go to your device’s settings and find the option to clear cached data. This can often help improve performance.
- Uninstall Unnecessary Apps: Unused apps can consume resources. Delete apps you no longer use.
- Update Software: Keeping your gadget’s operating system up to date can enhance performance, as updates often include optimizations.
- Factory Reset (last resort): If all else fails, consider a factory reset. This will erase all data on your device, so back up important information first. A factory reset can often rejuvenate a sluggish gadget.
2. Battery Drain
Problem: Your gadget’s battery is draining quickly, even when not in use.
Solution:
- Check Battery Usage: Go to your device’s settings and check which apps are using the most battery. If there’s an app consuming a significant amount of power, consider uninstalling or optimizing it.
- Reduce Screen Brightness: Lowering your screen brightness or enabling auto-brightness can extend battery life.
- Close Background Apps: Make sure no unnecessary apps are running in the background. On most devices, you can swipe them away in the multitasking view.
- Update Apps: Outdated apps can be inefficient and drain your battery faster. Keep all apps up to date.
Struggling with your gadget’s battery life? Here are a few simple tips to make it last longer
3. Wi-Fi Connectivity Issues
Problem: Your gadget frequently disconnects from Wi-Fi or has a weak signal.
Solution:
- Restart Router: Often, the problem lies with the Wi-Fi router. Try restarting it by unplugging it for 10 seconds and then plugging it back in.
- Forget and Reconnect: In your device’s Wi-Fi settings, forget the problematic network and then reconnect by entering the password.
- Check for Interference: Other electronic devices, walls, or appliances can interfere with Wi-Fi signals. Make sure the router is reasonably within the range of your device.
- Update Router Firmware: Sometimes, router firmware updates can improve connectivity.
4. Overheating
Problem: Your gadget becomes excessively hot during use.
Solution:
- Close Resource-Intensive Apps: Some apps, particularly games and video streaming apps, can cause your gadget to overheat. Close them when not in use.
- Keep Device Ventilated: Ensure that your gadget has proper ventilation. Avoid using it on soft surfaces like beds or sofas, which can block airflow.
- Remove Case (if applicable): If you’re using a protective case, it might be trapping heat. Remove it temporarily and see if that helps.
- Update Software: As with performance issues, software updates can sometimes include thermal optimizations.
5. Frozen or Unresponsive Screen
Problem: Your gadget’s screen becomes frozen or unresponsive to touch.
Solution:
- Force Restart: Different devices have different methods to force a restart. Look up the specific instructions for your gadget and try this if the screen is unresponsive.
- Check for Updates: Software updates can often fix screen-related issues.
- Factory Reset (last resort): As a last resort, consider a factory reset. Remember to back up your data first.
6. No Sound or Audio Problems
Problem: Your gadget has no sound or audio-related issues.
Solution:
- Check Volume Settings: Ensure that the volume is not muted or set too low.
- Restart Device: Sometimes, a simple restart can resolve audio issues.
- Check Headphones/External Speakers: If you’re using headphones or external speakers, make sure they are working properly and connected correctly.
- Update Audio Drivers (for PCs): On computers, outdated or corrupted audio drivers can cause issues. Update them through your device’s settings.
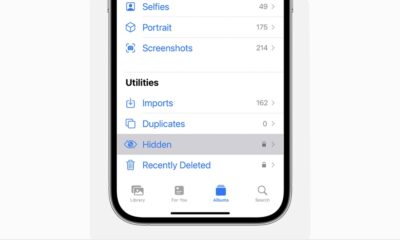
7. App Crashes
Problem: Apps on your gadget crash frequently.
Solution:
- Update Apps: Make sure all your apps are up to date. Developers often release updates to fix bugs.
- Clear App Cache and Data: In your device’s settings, you can clear the cache and data of specific apps. This can resolve issues caused by corrupted data.
- Check for OS Updates: Ensure your gadget’s operating system is up to date, as this can affect app stability.
- Reinstall Problematic Apps: If a particular app keeps crashing, try uninstalling it and then reinstalling it from the app store.
By following these troubleshooting steps, you can often resolve common gadget problems on your own. However, if the issues persist or are beyond your expertise, it’s advisable to seek professional help. Additionally, always remember to back up your data regularly to prevent data loss during troubleshooting or repairs.
In conclusion, gadgets are essential tools in our modern lives, but they can occasionally pose challenges.
With the right knowledge and techniques, you can troubleshoot and resolve common gadget problems, ensuring that your devices continue to serve you reliably and efficiently.


Google Maps offers a plethora of features to enhance your navigation experience, and one such feature is the ability to explore locations in 3D. By activating the 3D view, users can immerse themselves in a more lifelike representation of cities, landscapes, and landmarks. In this comprehensive guide, we’ll walk you through the step-by-step process of turning on 3D view on Google Maps across different platforms.
For Desktop Users
1. Open Google Maps: Launch your preferred web browser and navigate to the Google Maps website.
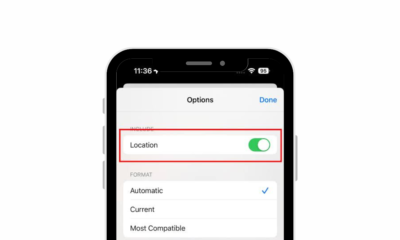
2. Switch to Satellite View: On the bottom-left corner of the screen, locate the square box labeled “Satellite” and click on it. This will switch the map view to satellite imagery.
3. Activate 3D View: While in satellite view mode, you’ll notice a “3D” button on the right-hand side of the screen, typically next to the compass icon. Click on this button to activate the 3D view. The map will tilt, providing a three-dimensional perspective.
4. Navigation and Exploration: Use your mouse to navigate in 3D. Click and drag to pan around the map. Hold down the Ctrl key (Cmd on Mac) and drag your mouse to adjust the angle or rotate the view. Scroll up and down to zoom in and out.
For Mobile Users (Android and iOS):
1. Open the Google Maps App: Launch the Google Maps app on your smartphone. If you don’t have the app installed, you can download it from the Google Play Store (for Android) or the Apple App Store (for iOS).
2. Select Satellite View: Once the app is open, tap on the layer icon, typically located in the upper-right corner of the screen. This will open the map type selection menu. Choose “Satellite” from the list of options.
3. Enable 3D View: Unlike the desktop version, activating the 3D view on mobile devices requires a different gesture. Use two fingers to swipe up on the screen. This action will tilt the view, transitioning it into 3D mode.
4. Explore in 3D: Navigate around the map by dragging with one finger. Pinch your fingers together or spread them apart to zoom in and out. To rotate the view, twist two fingers on the screen.
The 3D feature on Google Maps is a valuable tool for exploring and understanding geographical locations in a more immersive way. Whether you’re planning a trip, studying urban landscapes, or simply satisfying your curiosity, activating the 3D view can enhance your mapping experience significantly. By following the step-by-step instructions provided in this guide, you can easily unlock the full potential of Google Maps’ 3D capabilities across desktop and mobile devices. Happy exploring!
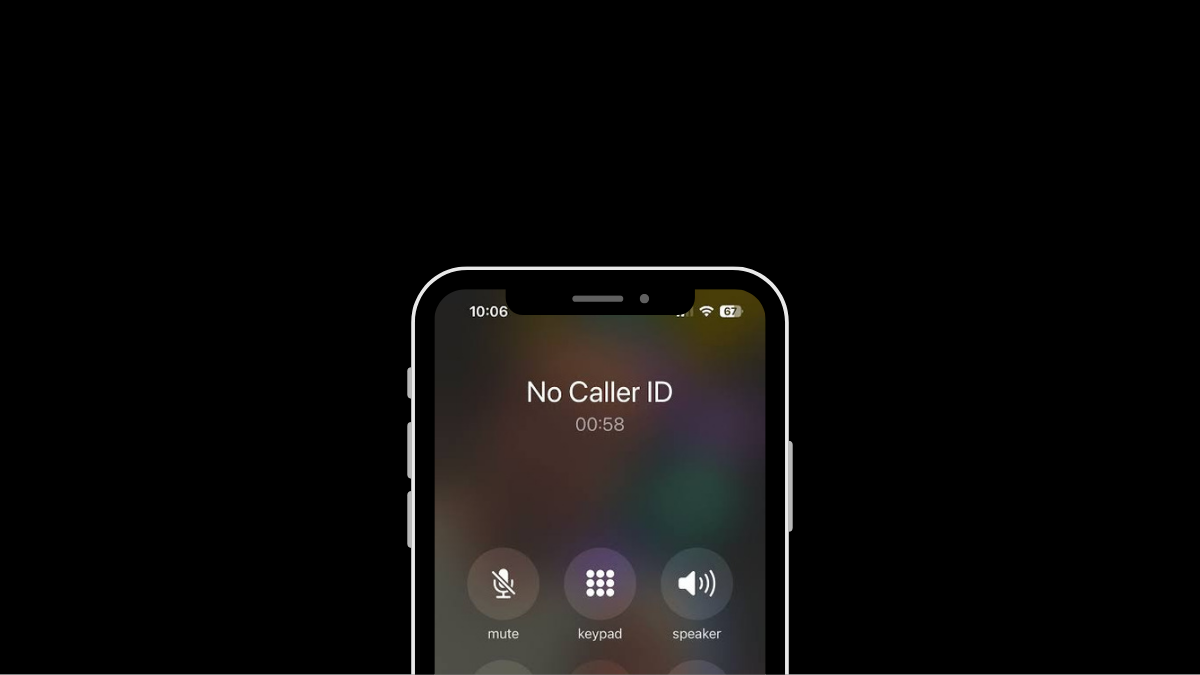
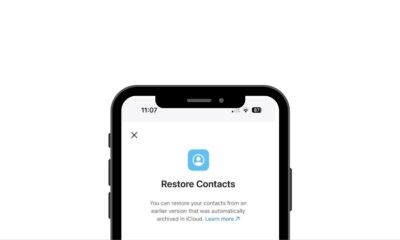
Having your phone number appear as “Private” or “Unknown” can be useful for maintaining privacy, but there are times when you might want to deactivate this feature. Whether you’re making important calls to friends, family, or businesses, having your number visible can enhance communication and ensure your calls are recognized and answered promptly. This guide provides step-by-step instructions for deactivating the private number feature on both iPhone and Android devices, empowering you to take control of your caller ID settings.
Deactivating Private Number on iPhone:
1. Open Settings: Locate and tap the Settings app on your iPhone’s home screen.
2. Access Phone Settings: Scroll down and tap on the “Phone” option in the Settings menu.
3. Caller ID Settings: Within the Phone settings, find and tap on the “Show My Caller ID” option.
4. Toggle Caller ID: Tap the toggle switch next to “Show My Caller ID” to turn it on (ensure it’s green). This action will make your phone number visible to recipients of your calls.
5. Verification: After enabling the setting, make a test call to confirm that your number now appears on the recipient’s caller ID.
6. Completion: Once your caller ID is successfully displayed, the private number feature is deactivated on your iPhone.
Deactivating Private Number on Android:
1. Open Phone App: Launch the Phone app on your Android device as if you were going to make a call.
2. Access Menu: Look for the three dots (menu) or additional options usually located at the top right corner of the screen. Tap on it.
3. Navigate to Settings: From the menu, select “Settings” or a similar option.
4. Find Caller ID Settings: Scroll through the settings options until you find “Supplementary Services,” “More settings,” or “Call settings.” Tap on it.
5. Caller ID Setting: Tap on “Show my caller ID,” “Caller ID,” or a similar option listed in the settings.
6. Select Display Option: Depending on your device, choose “Show number” or the equivalent to ensure your phone number is displayed to recipients of your calls.
7. Verification: Make a test call after adjusting the settings to confirm that your number now appears on the recipient’s caller ID.
8. Completion: Once your number is successfully displayed, the private number feature is deactivated on your Android device.
Additional Tips:
Patience: Changes to caller ID settings may take a few minutes to take effect. If your number still appears private immediately after making changes, wait a bit and try again.
Restart Device: If the settings don’t seem to apply, restarting your device can help refresh the settings.
Carrier Settings: If the issue persists, contact your phone carrier directly. They may have set your number to appear as private, and they can assist you in changing this setting.
By following these steps, you can easily deactivate the private number feature on both iPhone and Android devices, ensuring your calls are recognized and answered promptly.

Xiaomi Redmi Note 13R Specifications
Android 15 Beta 2 Unveiled With Enhanced Features

OPPO Reno 12 Series: Design, Launch Date and Specifications
-

 Tech News6 days ago
OnePlus 13 and 13R Potential Designs Unveiled
-

 Tech News3 days ago
Android to Introduce Theft Detection Lock: Detecting When Your Phone is Snatched
-

 Tech News6 days ago
Sony Xperia 1 VI Camera Sensors Revealed
-

 Tech News7 days ago
Apple Nearing Deal with OpenAI to Integrate Generative AI Features into iOS 18
-

 Reviews4 days ago
Sony Xperia 1 VI Set for Unveiling With a Remarkable Camera
-

 Tech News6 days ago
Google Pixel 9 Series to Introduce Four Distinct Models
-
 Reviews2 days ago
Xiaomi Redmi Note 13R Specifications
-
 Reviews3 days ago
OPPO Reno 12 Series: Design, Launch Date and Specifications