How To
How To Maximise Productivity on Your Smartphone

Smartphones have become indispensable tools that help us manage our personal and professional lives.
However, they can also be major sources of distraction if not used wisely. In this blog post, we will explore strategies and tips on how to harness the full potential of your smartphone to boost productivity.
By the end of this article, you’ll have a clear roadmap to make your smartphone an asset rather than a hindrance to your daily tasks.
Prioritise Your Apps
The first step in maximizing productivity on your smartphone is to take stock of the apps you have installed. Most people have dozens, if not hundreds, of apps on their devices. To declutter and streamline your smartphone experience:
- Identify Essential Apps: Start by identifying the apps that are essential for your daily tasks and goals. These might include email, calendar, task management, and note-taking apps.
- Delete Unnecessary Apps: Delete apps you rarely use or that serve no practical purpose in your life. Removing distractions is crucial for productivity.
- Organise into Folders: Organise your remaining apps into folders based on categories (e.g., productivity, entertainment, social media) to make them easier to find.
Master Your Notifications
Notifications can be a constant source of interruption and distraction. Take control of them to stay focused:
- Customize Notification Settings: Review and customize notification settings for each app. Disable non-essential notifications or set them to appear less frequently.
- Use Do Not Disturb Mode: Consider using the “Do Not Disturb” mode during focused work or rest periods. You can allow exceptions for important calls or messages from specific contacts.
- Schedule Check-Ins: Instead of reacting to every notification as it arrives, schedule specific times to check your messages and email. This prevents constant interruptions.
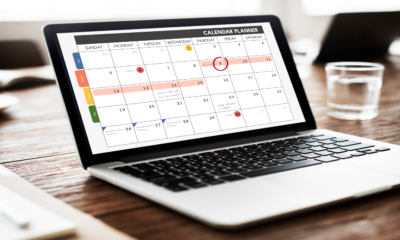
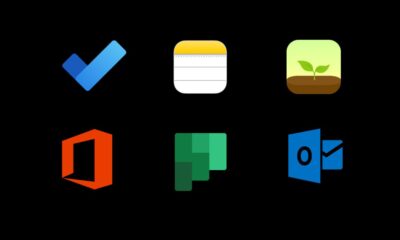
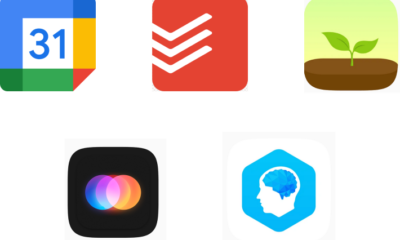
Embrace Time Management Apps
Smartphones offer a wide array of time management apps that can boost your productivity:
- Calendar Apps: Use calendar apps to schedule and prioritize your tasks. Set reminders for appointments and deadlines.
- Task Management Apps: Consider using task management apps like Todoist, Trello, or Asana to organise your to-do lists and track progress.
- Note-Taking Apps: Apps like Evernote and OneNote can help you jot down ideas, create checklists, and store important information for easy access.
Leverage Virtual Assistants
Virtual assistants like Siri (Apple), Google Assistant (Android), and Amazon Alexa can be incredibly helpful in streamlining tasks:
- Voice Commands: Use voice commands to set reminders, send texts, or even control your smart home devices. It’s a hands-free way to accomplish tasks quickly.
- Voice Dictation: Take advantage of voice-to-text features to transcribe notes or emails, saving you time on typing.
Optimize Your Keyboard
Your smartphone’s keyboard is a tool you use constantly. Make sure it works for you:
- Third-Party Keyboards: Consider using third-party keyboard apps that offer features like gesture typing and predictive text. SwiftKey and Gboard are popular options.
- Custom Shortcuts: Set up custom keyboard shortcuts for frequently used phrases or email responses. This can save you time when typing long messages.
Digital Detox and Screen Time Management
Excessive screen time can lead to reduced productivity. Implement these strategies to maintain a healthy digital balance:
- Set Screen Time Limits: Both iOS and Android devices offer screen time management features. Set daily limits for specific apps to curb excessive use.
- Take Regular Breaks: Use apps that remind you to take short breaks during work sessions. These breaks can help improve focus and prevent burnout.
Cloud Storage and Syncing
Make the most of cloud storage to access your files and data across devices:
- Use Cloud Services: Services like Google Drive, Dropbox, and iCloud enable you to store documents, photos, and other files in the cloud. This ensures you can access them from anywhere.
- Sync Across Devices: Enable syncing for your apps and services so that changes made on your smartphone are reflected on your other devices seamlessly.
Secure Your Device
Security is crucial when using your smartphone for productivity:
- Lock Screen and Biometrics: Set up a secure lock screen method (PIN, fingerprint, face recognition) to protect your data.
- Regular Updates: Keep your device’s operating system and apps up to date to patch security vulnerabilities.
Multitasking Tips
While multitasking can be a valuable skill, it’s essential to use it wisely:
- Split-Screen Mode: Many smartphones offer split-screen mode, allowing you to work on two apps simultaneously. Use this for tasks that complement each other, like note-taking while reading.
Mindful Smartphone Usage
Lastly, practice mindful smartphone usage:
- Digital Minimalism: Embrace digital minimalism by regularly evaluating your app usage and simplifying your smartphone experience.
- Night Mode: Consider using night mode to reduce blue light emissions in the evening, promoting better sleep.
Your smartphone is a powerful tool that can significantly enhance your productivity when used wisely.
By prioritizing essential apps, mastering notifications, and leveraging time management tools, you can transform your smartphone into a productivity powerhouse.
Remember to also maintain a healthy digital balance and practice mindfulness in your smartphone usage. With these strategies in place, you will be well on your way to maximising productivity in the digital age.
Frequently Asked Questions
Q1: Are there specific apps designed to boost productivity on smartphones?
- A1: Yes, there are various productivity apps. Examples include task management apps like Todoist or Asana, note-taking apps like Evernote, and calendar apps such as Google Calendar or Apple Calendar.
Q2: How can I use my smartphone to manage my daily tasks efficiently?
- A2: Efficient task management on your smartphone involves:
- Setting priorities for tasks.
- Using task management apps.
- Creating daily to-do lists.
- Utilising reminders and notifications.
Q3: Are there features on smartphones that can enhance productivity?
- A3: Yes, features such as:
- Voice assistants for hands-free commands.
- Quick settings for easy access to essential functions.
- Widgets for at-a-glance information.
- Keyboard shortcuts for faster typing.
Q4: How can I minimise distractions on my smartphone to stay productive?
- A4: To minimize distractions:
- Turn off non-essential notifications.
- Use the “Do Not Disturb” mode during focused work.
- Consider using apps that block distracting websites.
Q5: Can my smartphone help with time management?
- A5: Yes, smartphones offer various tools for time management, including:
- Calendar apps for scheduling.
- Timer and stopwatch features.
- Time-tracking apps for monitoring activities.


Google Maps offers a plethora of features to enhance your navigation experience, and one such feature is the ability to explore locations in 3D. By activating the 3D view, users can immerse themselves in a more lifelike representation of cities, landscapes, and landmarks. In this comprehensive guide, we’ll walk you through the step-by-step process of turning on 3D view on Google Maps across different platforms.
For Desktop Users
1. Open Google Maps: Launch your preferred web browser and navigate to the Google Maps website.
2. Switch to Satellite View: On the bottom-left corner of the screen, locate the square box labeled “Satellite” and click on it. This will switch the map view to satellite imagery.
3. Activate 3D View: While in satellite view mode, you’ll notice a “3D” button on the right-hand side of the screen, typically next to the compass icon. Click on this button to activate the 3D view. The map will tilt, providing a three-dimensional perspective.
4. Navigation and Exploration: Use your mouse to navigate in 3D. Click and drag to pan around the map. Hold down the Ctrl key (Cmd on Mac) and drag your mouse to adjust the angle or rotate the view. Scroll up and down to zoom in and out.
For Mobile Users (Android and iOS):
1. Open the Google Maps App: Launch the Google Maps app on your smartphone. If you don’t have the app installed, you can download it from the Google Play Store (for Android) or the Apple App Store (for iOS).
2. Select Satellite View: Once the app is open, tap on the layer icon, typically located in the upper-right corner of the screen. This will open the map type selection menu. Choose “Satellite” from the list of options.
3. Enable 3D View: Unlike the desktop version, activating the 3D view on mobile devices requires a different gesture. Use two fingers to swipe up on the screen. This action will tilt the view, transitioning it into 3D mode.
4. Explore in 3D: Navigate around the map by dragging with one finger. Pinch your fingers together or spread them apart to zoom in and out. To rotate the view, twist two fingers on the screen.
The 3D feature on Google Maps is a valuable tool for exploring and understanding geographical locations in a more immersive way. Whether you’re planning a trip, studying urban landscapes, or simply satisfying your curiosity, activating the 3D view can enhance your mapping experience significantly. By following the step-by-step instructions provided in this guide, you can easily unlock the full potential of Google Maps’ 3D capabilities across desktop and mobile devices. Happy exploring!
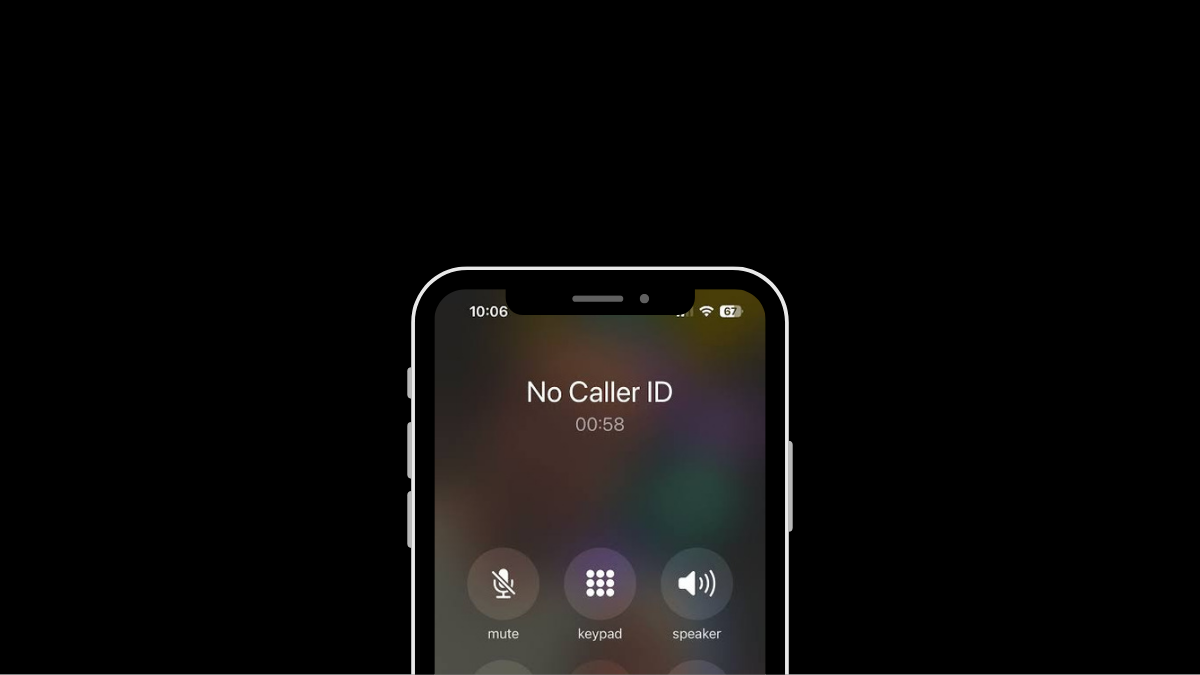
Having your phone number appear as “Private” or “Unknown” can be useful for maintaining privacy, but there are times when you might want to deactivate this feature. Whether you’re making important calls to friends, family, or businesses, having your number visible can enhance communication and ensure your calls are recognized and answered promptly. This guide provides step-by-step instructions for deactivating the private number feature on both iPhone and Android devices, empowering you to take control of your caller ID settings.
Deactivating Private Number on iPhone:
1. Open Settings: Locate and tap the Settings app on your iPhone’s home screen.
2. Access Phone Settings: Scroll down and tap on the “Phone” option in the Settings menu.
3. Caller ID Settings: Within the Phone settings, find and tap on the “Show My Caller ID” option.
4. Toggle Caller ID: Tap the toggle switch next to “Show My Caller ID” to turn it on (ensure it’s green). This action will make your phone number visible to recipients of your calls.
5. Verification: After enabling the setting, make a test call to confirm that your number now appears on the recipient’s caller ID.
6. Completion: Once your caller ID is successfully displayed, the private number feature is deactivated on your iPhone.
Deactivating Private Number on Android:
1. Open Phone App: Launch the Phone app on your Android device as if you were going to make a call.
2. Access Menu: Look for the three dots (menu) or additional options usually located at the top right corner of the screen. Tap on it.
3. Navigate to Settings: From the menu, select “Settings” or a similar option.
4. Find Caller ID Settings: Scroll through the settings options until you find “Supplementary Services,” “More settings,” or “Call settings.” Tap on it.
5. Caller ID Setting: Tap on “Show my caller ID,” “Caller ID,” or a similar option listed in the settings.
6. Select Display Option: Depending on your device, choose “Show number” or the equivalent to ensure your phone number is displayed to recipients of your calls.
7. Verification: Make a test call after adjusting the settings to confirm that your number now appears on the recipient’s caller ID.
8. Completion: Once your number is successfully displayed, the private number feature is deactivated on your Android device.
Additional Tips:
Patience: Changes to caller ID settings may take a few minutes to take effect. If your number still appears private immediately after making changes, wait a bit and try again.
Restart Device: If the settings don’t seem to apply, restarting your device can help refresh the settings.
Carrier Settings: If the issue persists, contact your phone carrier directly. They may have set your number to appear as private, and they can assist you in changing this setting.
By following these steps, you can easily deactivate the private number feature on both iPhone and Android devices, ensuring your calls are recognized and answered promptly.

Xiaomi Redmi Note 13R Specifications
Android 15 Beta 2 Unveiled With Enhanced Features

OPPO Reno 12 Series: Design, Launch Date and Specifications
-

 Tech News7 days ago
OnePlus 13 and 13R Potential Designs Unveiled
-

 Tech News4 days ago
Android to Introduce Theft Detection Lock: Detecting When Your Phone is Snatched
-

 Tech News7 days ago
Sony Xperia 1 VI Camera Sensors Revealed
-

 Tech News7 days ago
Apple Nearing Deal with OpenAI to Integrate Generative AI Features into iOS 18
-

 Reviews4 days ago
Sony Xperia 1 VI Set for Unveiling With a Remarkable Camera
-

 Tech News6 days ago
Google Pixel 9 Series to Introduce Four Distinct Models
-
 Reviews3 days ago
OPPO Reno 12 Series: Design, Launch Date and Specifications
-
 Reviews3 days ago
Xiaomi Redmi Note 13R Specifications