How To
The Ideal Smartphone for Your Needs: How to Choose
Choosing the ideal smartphone for your need can be a daunting task. This comprehensive guide will walk you through the essential factors to consider when selecting a smartphone that suits you.

Smartphones have essentially become a necessity in our fast-paced daily lives. These compact devices serve as our communication hub, entertainment center, and productivity tool, making it crucial to select the right one that aligns with your needs and preferences. With a plethora of options available in the market, choosing the ideal smartphone for your need can be a daunting task. This comprehensive guide will walk you through the essential factors to consider when selecting a smartphone that suits you.
Define Your Budget
The first step in choosing the your ideal smartphone is to determine your budget. Smartphones come in various price ranges, from budget-friendly options to flagship devices with premium price tags. Your choices will be limited by your budget, which will also keep you from overspending. Consider what features are most important to you and find a balance between your needs and your budget.
Identify Your Priorities
Different individuals have different priorities when it comes to smartphones. Some might prioritize camera quality for photography enthusiasts, while others may prioritize performance for gaming and multitasking. Here are some common priorities to consider.
Camera: If you love taking photos and videos, a smartphone with a high-quality camera system, including multiple lenses and advanced software features, should be a top consideration.
Performance: For those who need a fast and responsive device for gaming or demanding apps, prioritize smartphones with powerful processors and ample RAM.
Battery Life: If you’re frequently on the go or don’t want to worry about constant charging, opt for a smartphone with a long-lasting battery.
Operating System: Decide between Android and iOS based on your preferences and the ecosystem you’re already invested in. Design and Build: Some users prefer sleek and stylish designs, while others prioritize durability and ruggedness.
Screen Size and Type: Consider whether you want a compact smartphone for easy one-handed use or a larger device for multimedia consumption.
Research Brands and Models
Once you have determined your priorities, research various smartphone brands and models that align with your needs. Popular brands like Apple, Samsung, Google, and OnePlus offer a range of options to cater to different preferences. Reading reviews, watching video comparisons, and seeking recommendations from friends and online communities can help you gain insights into the strengths and weaknesses of different smartphones.
Consider the Ecosystem
If you are already using other devices, such as a tablet, laptop, or smartwatch, consider how well your new smartphone will integrate into your existing ecosystem. For example, if you are heavily invested in the Apple ecosystem, an iPhone might be the most seamless choice, as it offers deep integration with other Apple devices and services.
Evaluate Camera Capabilities
The camera has become a crucial aspect of smartphones for many users. If photography is a significant consideration for you, pay attention to the camera specifications, including megapixels, aperture size, and the presence of features like optical image stabilization (OIS) and night mode. Test the camera in different lighting conditions to see if it meets your expectations.
Assess Performance
For smooth multitasking, fast app launches, and seamless gaming, performance is key. Pay attention to the smartphone’s processor, RAM, and storage capacity. High-end processors like Qualcomm Snapdragon and Apple’s A-series chips offer top-notch performance. Consider at least 6GB of RAM for a lag-free experience, especially if you plan to keep the device for a few years. 7.
Battery Life Matters
Nobody enjoys a smartphone that requires constant charge.
Look for a smartphone with a battery capacity that suits your usage patterns. Battery life can vary significantly between models, so read reviews and consider real-world usage scenarios to gauge how long a device can last on a single charge.
Operating System and User Interface
The choice between Android and iOS often boils down to personal preference. Android offers more customization options and a wide range of device choices, while iOS provides a more controlled and seamless experience within the Apple ecosystem. Test both operating systems to see which one feels more intuitive and comfortable for you.
Check Software Updates
Regular software updates are essential for security, bug fixes, and access to the latest features. Some Android manufacturers are notorious for delayed updates, so check the update track record of the brand you’re considering. iPhones typically receive timely updates for several years, which can be a significant advantage.
Storage and Expandability
Consider how much storage you need for apps, photos, videos, and other files. Some smartphones offer expandable storage through microSD cards, while others have fixed storage. Opt for a model with ample internal storage if you plan to store a lot of media locally.
Build Quality and Durability
The build quality of a smartphone can impact its longevity. Premium materials like glass and metal often provide a more premium feel but can be fragile. Consider using a protective case and screen protector to safeguard your investment. Some smartphones also come with water and dust resistance ratings, which can be beneficial in harsh conditions.
Connectivity and Network Compatibility
Ensure that the smartphone you choose is compatible with your carrier’s network bands and technologies. Additionally, consider features like 5G support if you want to future-proof your device for faster data speeds.
Assess Additional Features
Smartphones often come with a variety of additional features that can enhance your user experience. These may include:
Fingerprint or Face Recognition: For secure and convenient device unlocking.
Wireless Charging: For hassle-free charging without cables.
Stereo Speakers: For improved audio quality when watching videos or playing games.
S Pen or Stylus Support: If you need precise input for note-taking or creative work.
Try Before You Buy
Whenever possible, visit a physical store to test the smartphone in person. Hold it in your hand, navigate through the interface, and check the screen quality. This hands-on experience can provide valuable insights that you might miss in online research.
Consider Long-Term Support
Think about how long you intend to keep your smartphone. Some brands offer longer software support and updates than others. If you want a device that will receive updates for several years, research which manufacturers have a reputation for providing extended support.
Read User Reviews and Seek Recommendations
User reviews and recommendations from friends and family who own the same smartphone model can provide valuable insights into real-world experiences. To make an informed choice, pay attention to both positive and negative input.
Check for Deals and Promotions
Before making a final decision, look for deals, promotions, and trade-in offers that can help you save money or get additional value with your purchase. Timing your purchase around major sale events can lead to significant savings.
Warranty and Customer Support
Finally, consider the warranty and customer support provided by the manufacturer. A robust warranty can provide peace of mind in case of hardware issues.
Check the warranty terms and conditions, as well as the reputation of the manufacturer’s customer service.
Choosing the ideal smartphone for your needs requires careful consideration of your budget, priorities, and preferences. It’s a decision that can impact your daily life, so take your time to research and test different options.


Google Maps offers a plethora of features to enhance your navigation experience, and one such feature is the ability to explore locations in 3D. By activating the 3D view, users can immerse themselves in a more lifelike representation of cities, landscapes, and landmarks. In this comprehensive guide, we’ll walk you through the step-by-step process of turning on 3D view on Google Maps across different platforms.
For Desktop Users
1. Open Google Maps: Launch your preferred web browser and navigate to the Google Maps website.
2. Switch to Satellite View: On the bottom-left corner of the screen, locate the square box labeled “Satellite” and click on it. This will switch the map view to satellite imagery.
3. Activate 3D View: While in satellite view mode, you’ll notice a “3D” button on the right-hand side of the screen, typically next to the compass icon. Click on this button to activate the 3D view. The map will tilt, providing a three-dimensional perspective.
4. Navigation and Exploration: Use your mouse to navigate in 3D. Click and drag to pan around the map. Hold down the Ctrl key (Cmd on Mac) and drag your mouse to adjust the angle or rotate the view. Scroll up and down to zoom in and out.
For Mobile Users (Android and iOS):
1. Open the Google Maps App: Launch the Google Maps app on your smartphone. If you don’t have the app installed, you can download it from the Google Play Store (for Android) or the Apple App Store (for iOS).
2. Select Satellite View: Once the app is open, tap on the layer icon, typically located in the upper-right corner of the screen. This will open the map type selection menu. Choose “Satellite” from the list of options.
3. Enable 3D View: Unlike the desktop version, activating the 3D view on mobile devices requires a different gesture. Use two fingers to swipe up on the screen. This action will tilt the view, transitioning it into 3D mode.
4. Explore in 3D: Navigate around the map by dragging with one finger. Pinch your fingers together or spread them apart to zoom in and out. To rotate the view, twist two fingers on the screen.
The 3D feature on Google Maps is a valuable tool for exploring and understanding geographical locations in a more immersive way. Whether you’re planning a trip, studying urban landscapes, or simply satisfying your curiosity, activating the 3D view can enhance your mapping experience significantly. By following the step-by-step instructions provided in this guide, you can easily unlock the full potential of Google Maps’ 3D capabilities across desktop and mobile devices. Happy exploring!
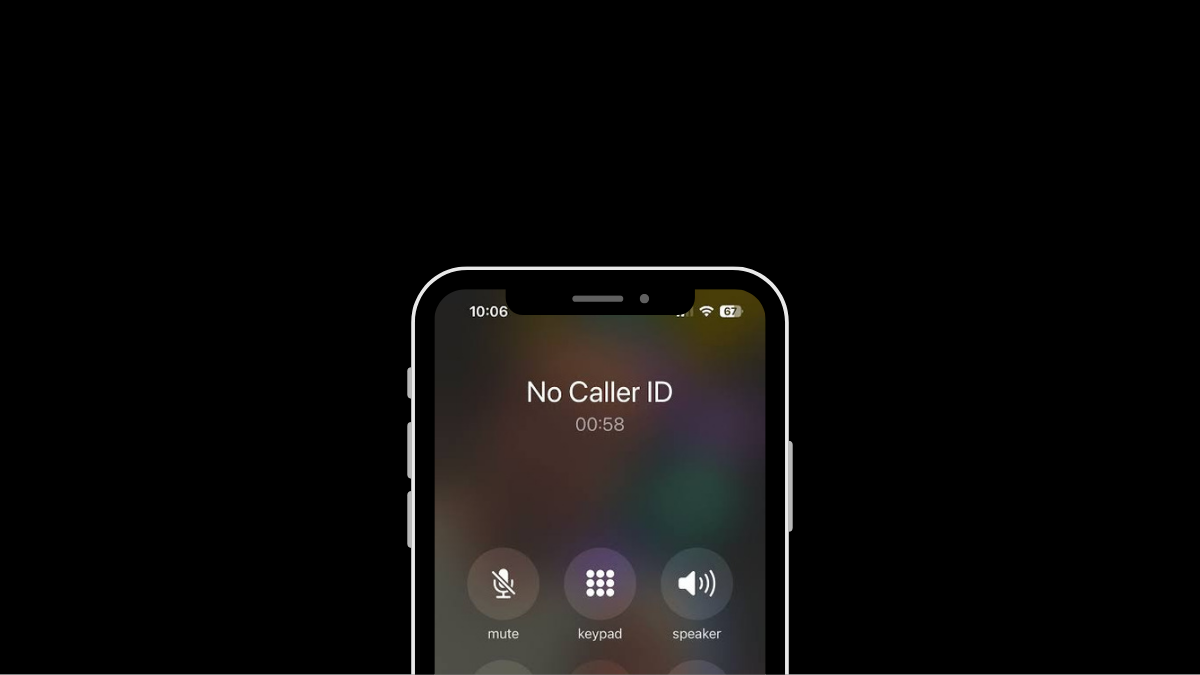
Having your phone number appear as “Private” or “Unknown” can be useful for maintaining privacy, but there are times when you might want to deactivate this feature. Whether you’re making important calls to friends, family, or businesses, having your number visible can enhance communication and ensure your calls are recognized and answered promptly. This guide provides step-by-step instructions for deactivating the private number feature on both iPhone and Android devices, empowering you to take control of your caller ID settings.
Deactivating Private Number on iPhone:
1. Open Settings: Locate and tap the Settings app on your iPhone’s home screen.
2. Access Phone Settings: Scroll down and tap on the “Phone” option in the Settings menu.
3. Caller ID Settings: Within the Phone settings, find and tap on the “Show My Caller ID” option.
4. Toggle Caller ID: Tap the toggle switch next to “Show My Caller ID” to turn it on (ensure it’s green). This action will make your phone number visible to recipients of your calls.
5. Verification: After enabling the setting, make a test call to confirm that your number now appears on the recipient’s caller ID.
6. Completion: Once your caller ID is successfully displayed, the private number feature is deactivated on your iPhone.
Deactivating Private Number on Android:
1. Open Phone App: Launch the Phone app on your Android device as if you were going to make a call.
2. Access Menu: Look for the three dots (menu) or additional options usually located at the top right corner of the screen. Tap on it.
3. Navigate to Settings: From the menu, select “Settings” or a similar option.
4. Find Caller ID Settings: Scroll through the settings options until you find “Supplementary Services,” “More settings,” or “Call settings.” Tap on it.
5. Caller ID Setting: Tap on “Show my caller ID,” “Caller ID,” or a similar option listed in the settings.
6. Select Display Option: Depending on your device, choose “Show number” or the equivalent to ensure your phone number is displayed to recipients of your calls.
7. Verification: Make a test call after adjusting the settings to confirm that your number now appears on the recipient’s caller ID.
8. Completion: Once your number is successfully displayed, the private number feature is deactivated on your Android device.
Additional Tips:
Patience: Changes to caller ID settings may take a few minutes to take effect. If your number still appears private immediately after making changes, wait a bit and try again.
Restart Device: If the settings don’t seem to apply, restarting your device can help refresh the settings.
Carrier Settings: If the issue persists, contact your phone carrier directly. They may have set your number to appear as private, and they can assist you in changing this setting.
By following these steps, you can easily deactivate the private number feature on both iPhone and Android devices, ensuring your calls are recognized and answered promptly.

Xiaomi Redmi Note 13R Specifications
Android 15 Beta 2 Unveiled With Enhanced Features

OPPO Reno 12 Series: Design, Launch Date and Specifications
-

 Tech News7 days ago
OnePlus 13 and 13R Potential Designs Unveiled
-

 Tech News3 days ago
Android to Introduce Theft Detection Lock: Detecting When Your Phone is Snatched
-

 Tech News6 days ago
Sony Xperia 1 VI Camera Sensors Revealed
-

 Tech News7 days ago
Apple Nearing Deal with OpenAI to Integrate Generative AI Features into iOS 18
-

 Reviews4 days ago
Sony Xperia 1 VI Set for Unveiling With a Remarkable Camera
-

 Tech News6 days ago
Google Pixel 9 Series to Introduce Four Distinct Models
-
 Reviews2 days ago
Xiaomi Redmi Note 13R Specifications
-
 Reviews3 days ago
OPPO Reno 12 Series: Design, Launch Date and Specifications